-
-27%
 Original price was: $1,789.00.$1,299.00Current price is: $1,299.00.
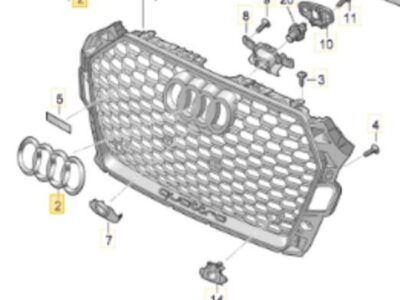
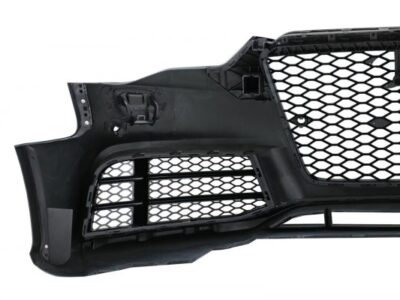
2019 AUDI RS5 STYLE FRONT GRILLE | GLOSS BLACK FRAME WITH HONEYCOMB MESH
(0)Upgrade your 2019 Audi RS5 Style Front Grille featuring a gloss black frame and honeycomb mesh. Precision-engineered for OEM fit, this grille enhances both style and airflow for a sleek, sporty look. Free shipping available!
-
-52%
 Original price was: $2,500.00.$1,200.00Current price is: $1,200.00.
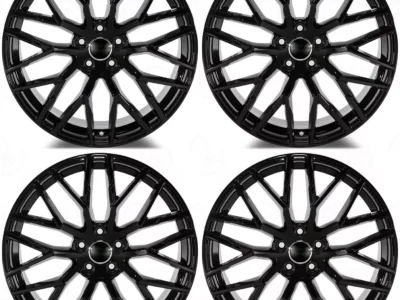
Audi Wheels Rims 22inch OEM
(0)Audi Wheels Rims 22inch OEM
Upgrade your Audi’s style and performance with genuine OEM 22-inch wheels. These rims offer a perfect fit and finish, designed to enhance your car’s appearance and handling. Experience the ultimate in luxury and precision engineering.
-
 $2,100.00
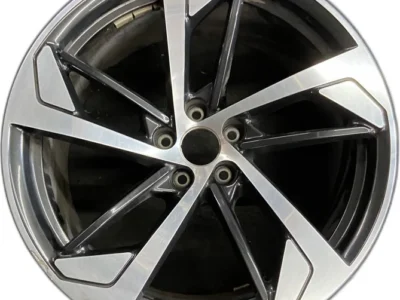
OEM Audi RS4 RS5 20 inch rims
(0)OEM Audi RS4 RS5 20 inch rims
Compatibility:
Audi RS5 B9 RS (2016-20**)
-
-29%
 Original price was: $209.00.$149.00Current price is: $149.00.
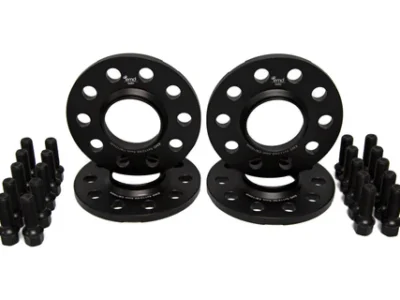
Wheel Spacer Flush Kit With Black Bolts Replacement
(0)Mfg Part #002411ECS03KT1
Wheel Spacer Flush Kit
Introduction to Wheel Spacer Flush Kits
Wheel spacer flush kits are integral components in the realm of vehicle modification, designed to enhance both aesthetics and performance. These kits serve the fundamental purpose of creating a flush fit between the wheels and the fenders of a vehicle, thereby contributing to an improved visual appeal. The flush fit is particularly favored by automotive enthusiasts who desire a wider stance and a more aggressive look for their vehicles. Not only do these kits augment the overall appearance of the vehicle, but they can also enhance stability and handling by widening the track width.
The primary components of a wheel spacer flush kit include the wheel spacers themselves and the essential bolts necessary for proper installation. Wheel spacers are designed to fit between the hub of the vehicle and the wheel, effectively pushing the wheel outward. This increased spacing provides the flush fit that many car aficionados seek. The thickness of the spacers can vary, allowing for customization based on personal preferences and specific vehicle requirements. It is crucial to select the appropriate spacer size to ensure optimal performance and safety.
Additionally, the significance of using the right bolts cannot be understated. The bolts must match the specifications required for the wheel spacers to guarantee a secure fit. Utilizing high-quality bolts helps to prevent issues such as loosening over time or potential wheel detachment, which could result in serious safety hazards. Therefore, when considering a wheel spacer flush kit, one must prioritize compatibility and quality to achieve the desired aesthetic while ensuring the safety and functionality of the vehicle.
Benefits of Using a Wheel Spacer Flush Kit
Wheel spacer flush kits are increasingly becoming popular among automotive enthusiasts due to their multiple advantages, particularly in enhancing the overall performance and aesthetics of a vehicle. One of the primary benefits of using this kit is the improvement in handling and stability. By adjusting the wheel’s position, the vehicle’s center of gravity is altered, which can lead to better cornering performance and a more responsive steering feel. This adjustment enhances the driving experience, allowing for greater confidence on the road.
Another significant advantage is the increased tire clearance provided by a wheel spacer flush kit. This additional clearance can accommodate a wider tire, which can improve traction and grip, especially in cornering situations. With wider tires, drivers can experience better road contact, translating to increased performance and safety. This enhances not only the vehicle’s ability to handle various driving conditions but also prolongs tire life due to more even wear.
The aesthetic enhancement offered by wheel spacers cannot be overlooked. A flush kit can provide a more aggressive stance to any vehicle. This visual upgrade can appeal to car enthusiasts looking to elevate the standard appearance of their rides. The broader, more flush look often contributes significantly to a vehicle’s design appeal, making it stand out on the road.
In summary, utilizing a wheel spacer flush kit with black bolts not only improves the vehicle’s handling, stability, and tire clearance but also enhances its visual appeal. The combination of these benefits makes wheel spacers an excellent investment for those looking to optimize their driving experience and the overall aesthetics of their vehicle.
Choosing the Right Black Bolts for Your Wheel Spacer Kit
When selecting black bolts for your wheel spacer flush kit, a few crucial considerations come into play to ensure optimal performance and safety. The most significant factor is the material of the bolts. High-quality materials, such as hardened steel or alloy, offer enhanced strength and durability, which are essential when securing wheel spacers. Opting for corrosion-resistant finishes can also prolong the life of the bolts, especially if you often drive in various weather conditions.
Another vital consideration is the length of the black bolts. Choosing bolts that are too short can compromise the effectiveness of the spacer installation, while overly long bolts may cause interference with other components of the wheel assembly. It is important to measure the thickness of the wheel spacers and the factory hub to determine the proper bolt length required for your application.
The thread pitch of the bolts is equally important and should match the specifications of the original wheel assembly. This ensures a secure fit and prevents issues such as cross-threading or loosening over time. It is advisable to consult your vehicle’s manual or a professional to verify the correct thread pitch required for your wheel spacers.
Compatibility is another key aspect when choosing black bolts. The bolts must not only fit the wheel spacer but also seamlessly integrate with the wheel itself. The head style of the bolts should complement the design of the wheel to maintain aesthetic appeal while ensuring functionality. Using high-quality, compatible black bolts will enhance safety, performance, and the longevity of your wheel spacer kit, thereby enhancing your overall driving experience.
Installation Process of a Wheel Spacer Flush Kit with Black Bolts
Installing a wheel spacer flush kit with black bolts is a practical way to enhance your vehicle’s aesthetics and performance. To begin this installation, certain tools are essential. You will require a car jack, jack stands, a lug wrench, a torque wrench, a ratchet and socket set, and potentially a cleaning cloth for any debris. It is also recommended to have safety goggles and gloves to protect yourself during the installation process.
Before proceeding with the installation, ensure that the vehicle is parked on a flat, stable surface and the engine is off. It is crucial to loosen the lug nuts on the wheels that will be receiving the spacers without removing them entirely. This process will allow for a smoother removal once the vehicle is elevated.
Next, use the car jack to lift the vehicle and secure it with jack stands. It is important to never rely solely on the jack for support while working under the vehicle. After safely elevating the vehicle, remove the lug nuts completely and take off the wheel to access the hub. Before attaching the wheel spacer, clean the surface of the hub and the back of the wheel to ensure proper contact and prevent any debris from affecting the fit.
With the wheel spacer in position, align it with the lug holes and reattach the wheel. Hand-tighten the lug nuts to secure the wheel in place. At this stage, it is important to consult the manufacturer’s specifications for the appropriate torque settings to ensure that the bolts are tightened correctly. This step is crucial to prevent any radials or vibrations when driving.
After securing the wheel, lower the vehicle back to the ground and use the torque wrench to tighten the lug nuts to the specified torque settings. It is advisable to check the tightness of the bolts after a short drive to ensure everything remains secure. Following these steps will help achieve a successful installation of your wheel spacer flush kit with black bolts.
Maintenance and Troubleshooting for Your Wheel Spacer Setup
Proper maintenance of your wheel spacer setup with black bolts is essential to ensure both longevity and optimal performance. Regular inspections play a crucial role in maintaining the integrity of your spacer installation. It is advisable to conduct routine checks every few thousand miles to examine the condition of the bolts and spacers. Look for any signs of wear, corrosion, or looseness in the bolts, as these can compromise the setup’s effectiveness and lead to safety issues. Tightening the bolts to the manufacturer’s specifications is crucial; using a torque wrench can help achieve the correct torque level, preventing potential loosening during driving.
Besides periodic checks, monitoring tire wear is also vital when using wheel spacers. The introduction of spacers can alter your vehicle’s alignment slightly. As a result, irregular tire wear may occur if your alignment is not adjusted. Make sure to regularly inspect your tires for any unusual patterns that may signal a misalignment. Should you notice this, it is well-advised to consult a professional for a wheel alignment adjustment, ensuring your tires wear evenly and prolonging their life.
Common issues may arise after installation, including the loosening of black bolts. If you find that the bolts are loosening despite proper torque application, it may be attributed to insufficient thread engagement or the wrong specifications. Applying thread locker on the bolts can help secure them more effectively. If problems persist, seeking professional assistance ensures that any underlying issues are diagnosed and addressed promptly.
By following these maintenance guidelines and troubleshooting tips, you can achieve optimal performance from your wheel spacer setup. Staying ahead of potential issues can keep your ride smooth and safe, allowing you to enjoy the benefits of enhanced wheel spacing.
includes:
- Front 15mm Spacers – Two
- Rear 10mm Spacer – Two
- 45mm Black Ball Seat Wheel Bolts – Ten
- 40mm Black Ball Seat Wheel Bolts – Ten
Lowered vehicles may experience some rubbing on the inner fender liners during cornering or over hard bumps in front with the aggressive fitment kit.
*This kit is designed to work with the factory 20″ 5-bar style wheels that are 20×9 ET26
-
-15%
-
-19%
 Original price was: $1,599.98.$1,299.98Current price is: $1,299.98.
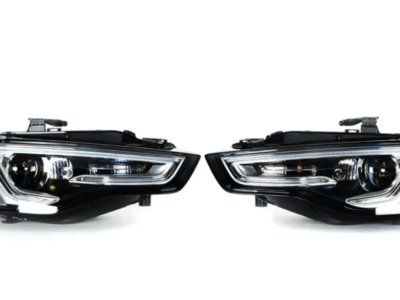
New Xenon Headlight Set Replacement
(5)Xenon Headlight Set
Mfg Part #8T0941753CKT
This Xenon Headlight Set Fits the Following Vehicles
Make Model Submodel Engine Audi B8 A5 Quattro 2.0T Audi B8 RS5 All 4.2L Audi B8 S5 Quattro 3.0T Cabriolet Audi B8 S5 Quattro 3.0T Coupe Introduction to Xenon Headlights
Xenon headlights, also known as high-intensity discharge (HID) headlights, represent a significant advancement in automotive lighting technology. Unlike traditional halogen headlights, which utilize a tungsten filament encased in a glass bulb, xenon headlights operate through an entirely different mechanism. They produce light by passing an electric arc between two electrodes, which ignites a gas mixture primarily composed of xenon. This process creates a more intense and brighter light output compared to halogen bulbs.
The primary difference between xenon and halogen headlights lies in their luminosity and performance. Xenon headlights emit a significantly brighter light, which is often described as a bluish-white tone that enhances visibility. This bright illumination not only allows for greater safety during nighttime driving but also improves the aesthetic appeal of modern vehicles. Their efficiency goes beyond mere brightness; xenon lights consume less energy and have a longer lifespan, making them a superior choice for energy-conscious consumers.
The growing popularity of xenon headlights in contemporary automobiles is attributable to these numerous advantages. Consumers and manufacturers alike have recognized the need for improved lighting solutions that enhance safety and style. As vehicle designers continue to innovate, the incorporation of xenon headlights becomes increasingly common, reflecting an industry trend toward high-performance lighting solutions. Furthermore, the transition from halogen to xenon is supported by advancements in technology that streamline installation, maintenance, and overall integration into existing vehicle systems.
Overall, the adoption of xenon headlights is reshaping automotive lighting, providing drivers with brighter, more efficient options that cater to modern driving demands. As the automotive landscape evolves, factors such as safety, efficiency, and aesthetics will continue to drive the preference for more advanced lighting technologies.
Benefits of Upgrading to Xenon Headlights
Upgrading to xenon headlights presents several advantages over traditional halogen options, significantly enhancing both visibility and overall driving experience. One of the most notable benefits is the increased brightness and clarity of xenon lights. These high-intensity discharge bulbs emit a pure white light that closely resembles natural daylight, which allows for better illumination of the road ahead during nighttime driving conditions. This heightened visibility contributes to a safer driving environment, as drivers can perceive potential hazards more clearly and promptly.
Another important factor to consider is energy efficiency. Xenon headlights consume less power compared to conventional halogen bulbs, translating to lower energy consumption from the vehicle’s electrical system. This efficiency not only reduces the load on the vehicle’s battery but also extends its lifespan. Consequently, owners of vehicles with xenon lighting systems may find themselves facing fewer electrical issues over the lifespan of the vehicle.
In addition to their efficiency, xenon headlights also boast a longer lifespan compared to traditional bulbs. Typically, xenon bulbs can last up to three times longer than halogen counterparts, reducing the frequency of replacements. This longevity not only results in cost savings for drivers over time but also decreases the frequency of maintenance efforts needed for headlight replacements.
Ultimately, the superior visibility, energy efficiency, and extended lifespan of xenon headlights contribute positively to road safety. Their bright illumination enhances driver awareness and reaction time, which are crucial factors in preventing accidents. Therefore, making the switch to xenon headlights is not just a matter of aesthetics; it plays a significant role in improving the overall safety and enjoyment of the driving experience.
Factors to Consider When Choosing a Xenon Headlight Set
When it comes to choosing a xenon headlight set, several critical factors must be considered to ensure optimal performance and compatibility with your vehicle. First and foremost, it is essential to verify the compatibility of the xenon headlight set with your specific vehicle model. Not all headlights fit every car, making compatibility a priority to avoid issues related to installation. Checking the vehicle manual or consulting with a trusted automotive professional can aid in this process.
Another vital factor to consider is the brightness levels of the xenon lights, which are measured in Kelvin (K). Typically, higher Kelvin ratings indicate a cooler, bluish light, while lower ratings yield a warmer, yellowish light. For instance, 4300K is often seen as the standard for optimum visibility, while 6000K is popular for its striking blue hue. However, consumers should be aware that while higher Kelvin lights offer aesthetic appeal, they may not provide the same level of brightness as their lower Kelvin counterparts. Thus, striking a balance between visual preference and practical lighting needs is crucial.
Lifespan is another significant consideration when selecting xenon headlight sets. These lights are known for their durability, often lasting significantly longer than traditional halogen bulbs. However, the quality of the product plays an important role in longevity. Selecting reputable brands known for their high-quality standards can help avoid early failures and performance issues. Additionally, consumers should not overlook the color temperature of the bulbs, as this can impact both visibility and aesthetics. It is prudent to research and compare options, focusing on products that balance quality with favorable performance characteristics.
Installation Process: DIY or Professional Help?
When considering the installation of new xenon headlight sets, one of the primary decisions is whether to undertake the process as a do-it-yourself (DIY) project or to enlist the assistance of a professional. Both options come with their distinct advantages and disadvantages, which merit careful evaluation.
For those inclined towards a DIY approach, the installation process typically begins with gathering the necessary tools, which may include a socket wrench, screwdrivers, pliers, and gloves for safety. Prior to starting, it is crucial to ensure that the vehicle is parked on a flat surface and the engine is turned off. Safety precautions, such as disconnecting the battery, should be observed to mitigate the risk of electrical shock. Once preparations are complete, the existing headlight assembly can often be removed by unscrewing or unclipping it. The new xenon headlight can then be installed by connecting the wiring harness and securing the assembly in place. While this process may appear straightforward, it does require a certain level of mechanical aptitude and patience.
On the other hand, seeking professional help for the installation of xenon headlight sets can be a wise choice for individuals who lack experience with automotive repairs. Professionals possess the necessary expertise and tools to ensure that the installation is performed correctly, minimizing the risk of potential errors that could arise during a DIY process. Additionally, many automotive service centers offer warranties or guarantees for their work, providing peace of mind should any issues arise post-installation. However, it is essential to consider the cost implications, as professional services may be more expensive compared to the DIY alternative.
In conclusion, the decision to install new xenon headlight sets personally or to seek professional help hinges on individual proficiency, comfort level, and financial considerations. Thoroughly evaluating these factors will aid in determining the best approach for a successful installation.
Maintenance and Care for Xenon Headlights
To ensure the longevity and optimal performance of xenon headlights, regular maintenance and care are essential. One of the primary aspects of maintaining xenon headlights involves checking their alignment. Proper alignment is crucial for visibility and safety, as misaligned headlights can lead to inadequate illumination of the road, potentially creating hazardous driving conditions. Routine checks can be performed at the beginning of each season or after any significant service to the vehicle. If misalignment is found, adjustments should be made promptly, usually by a professional mechanic or an automotive technician.
Cleaning is another vital part of xenon headlight maintenance. Over time, dirt, grime, and other debris can accumulate on the headlight lenses, leading to reduced visibility. It is advisable to clean the headlights periodically with a soft cloth and a suitable cleaner specifically designed for automotive finishes. Avoid abrasive materials that may scratch the lens surface. For more persistent residues, consider using specialized headlight restoration kits available on the market, which can restore clarity and improve illumination.
Furthermore, knowing when to replace xenon bulbs is critical for maintaining optimal lighting. Unlike traditional halogen bulbs, xenon bulbs can have a longer lifespan, usually lasting about 2,000 hours or more. However, they do not last indefinitely. If drivers notice a flickering light, reduced brightness, or a color shift in the headlight beam, these are signs that the bulbs may need replacement. It is always best to replace both bulbs simultaneously, even if only one is malfunctioning, to ensure even lighting and prevent uneven performance.
Lastly, maintaining the entire headlight assembly is crucial for overall safety and visual clarity. Regular inspections should include checking for any moisture build-up, cracks, or seals that may have deteriorated. Addressing these issues promptly can prevent water intrusion and help maintain the efficacy of the headlights. With proper care, xenon headlights can enhance both the aesthetic of the vehicle and the safety of nighttime driving..98
